

Xtream UI is still available to use freely. This is a fully-featured IPTV panel for newbies that do not have much money to invest in the IPTV market.
Remember to make a backup everything in advance such as configuration files and databases, and etc.
Getting Ready
I’m offering paid services, get your services fixed or install by me.
Choosing OS For Xtream UI Main Server:
First of all, select Ubuntu 18.04.5 LTS (Bionic Beaver) Or Ubuntu 18.04 as the operating system of your dedicated server. Make sure it’s a dedicated server, not the VPS, VPS still can be used but is never recommended.
Install Necessary Software PuTTY and WinSCP:
Make sure to install PuTTY and WinSCP on your local machine which you’ll use to command your dedicated server like your home or work PC or laptop so we can run commands on PuTTY and transfer files using WinSCP. PuTTY is mostly used to this thing always but to make file transfers the WinSCP software is always useful.
Logging To Root User:
If your server company has sent you any other username except root then let’s first make it let us log in as root.
- Open PuTTY
- Paste the IP or hostname of your dedicated server
- Hit Enter
- It will ask for some security concerns, ignore them, and Yes
- Now it will ask you to provide a username, provide your company provided username like I’m gonna use mine as lofertech
- Enter provided password and after successful login command su root and hit enter
- It will now ask you to root password add the same password that you used to login to your custom username and hit enter.
- If login is successful, we’ll next process to make our server enable for root login. Or if your login fails here, the fix is only to contact your company and ask them to enable root and send you the root password.
- Now enter command
apt-get install nano && nano /etc/ssh/sshd_configThis will installnanoand open file/etc/ssh/sshd_config
In this file, you’ll see the following lines:
# Authentication:
#LoginGraceTime 2m
#PermitRootLogin prohibit-password
#StrictModes yes
#MaxAuthTries 6
#MaxSessions 10
PermitRootLogin no
- Where you can see
PermitRootLogin noyou need to edit it toPermitRootLogin yes. When changes made, typeCTRL + XthenYand hit enter. - Final step run this command:
sudo /etc/init.d/ssh restart
So, we made root login enabled successfully.
After the complete installation of the operating system, now we need to make sure that you can log in to the server via root as username. If your service-providing company has sent you username as root then direct add IP to PuTTY username as root hit enter and password then enter. Now we’re logged in as root into our dedicated server and now can proceed to Xtream UI IPTV Panel installation.
Quick Installation:
- Login to root
- run Xtream-UI installation script
- choose Main, yes & hit enter
- now re-run script (
sudo python install.py) - choose MAIN, yes, hit enter
- type any random MySQL password, hit enter
- now installation completed, save MySQL password
- your panel URL: http://yourserverip:25500
You can watch this on YouTube. This was a quick installation guide for the main server, for detailed installation guide and upgrading it to the latest Xtream-UI version R22F, read more below or read about load balancer installation.
To install Xtream UI Admin UI, we need mirrors that make auto-install for the Xtream UI installation script. Pls visit any of the mirror links below and there you need to copy scripts provided by them.
Xtream UI Installation Mirrors
There are 2 official mirrors still available for the installation files of the panel. Here is a list of all available mirrors for the Xtream UI.
apt-get update ; apt-get install libxslt1-dev libcurl3 libgeoip-dev python -y ; wget https://lofertech.com/xui/install.py ; sudo python install.py
https://honey-panel.github.io/mirrors.html
https://github.com/emre1393/xtreamui_mirror
Installation Script
Pls copy the commands from any of the above mirrors, make sure if there are many mirrors you need to copy 1 command not all. Let’s say we’re choosing the following one, copy the following command and on PuTTY right-click to paste and hit enter to run.
apt-get update ; apt-get install libxslt1-dev libcurl3 libgeoip-dev python -y ; wget https://lofertech.com/xui/install.py ; sudo python install.py
After that, you can keep running the command sudo python install.py to get the installation menu again.
After the command process you’ll see the following output:

xtream ui installer script install.py
TIP: In this menu, MAIN is core files installation for the panel, Update means updating your main panel to the R22F version and LB goes for load balancer (an extra dedicated server for streams or VOD).
Now we need to go for MAIN, so type MAIN and hit enter, It will now ask to confirm type Y and hit enter and it will start installing core files of the panel. The next stop will be at asking you for MySQL databases removal (make it Yes if you tried few other mirrors already to install the panel) or MySQL root password: Type any random password, hit enter then type Y and hit enter again to continue installation, so the end here is going to be like:
Installation completed!
Please store your MySQL password!
xxxxxxxxetc123

To Update Your existing Panel, you can run the mirror script and select Update, copy-paste the URL provided on PuTTY, and hit enter.

update xtream ui panel to r22f
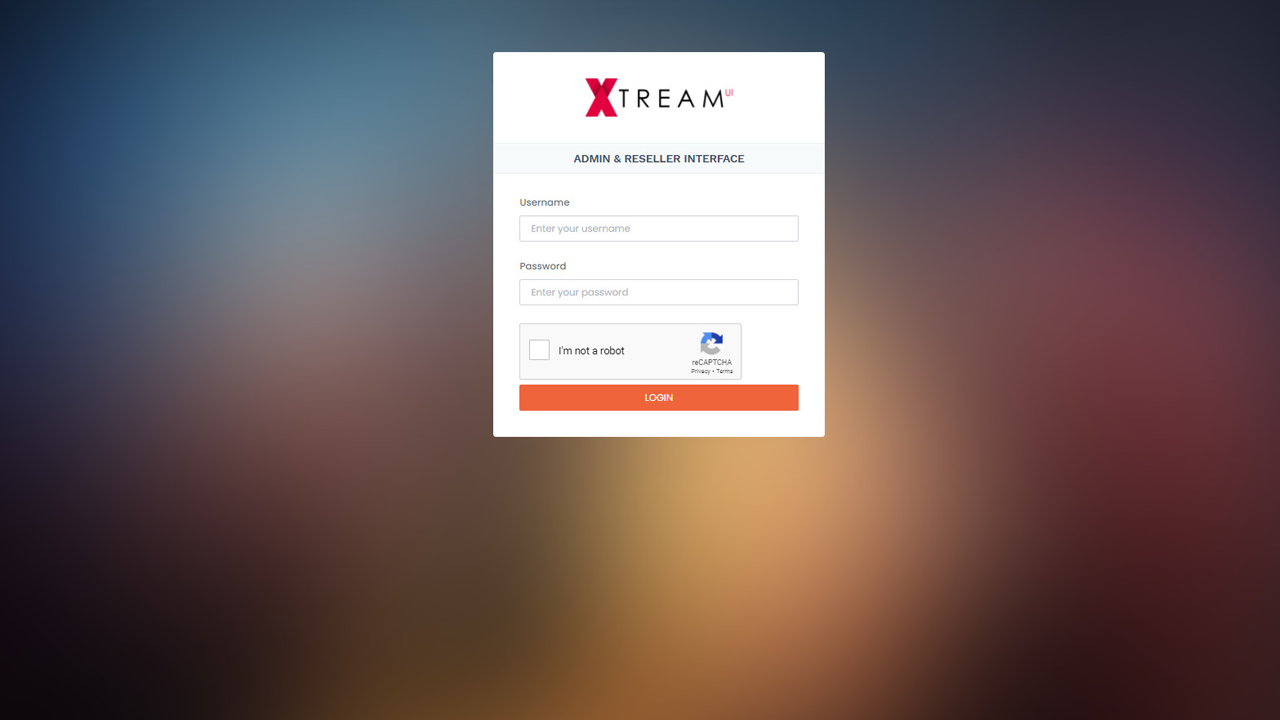
Now, as installation completed it shared us a URL to our panel should be like: Admin UI: http://yourip:25500 . It says our panel has been successfully installed. Copy the provided URL and you’ll get your panel login page. The default login for the Panel is username = admin and password = admin

xtream ui panel installed
Now your Xtream UI admin panel has been successfully installed, you need to apply the following commands in order to make your panel professionally running. The new mirror does panel update automatically.
Configure
Upon first install, the script installs the beta version that is available with very limited options which is Xtream UI R22E – Early Access but we need need to upgrade it to Xtream UI R22F – Early Access so we can access premium features. The owners of CMS suggested all users upgrade to their most recent and free 22F beta version.
Update Xtream UI:
You can update on mirror by using the UPDATE button or can do it manually by updating Xtream UI R22E – Early Access to Xtream UI R22F – Early Access run following command:
apt-get install unzip e2fsprogs python-paramiko -y && rm -rf /home/xtreamcodes/iptv_xtream_codes/admin && rm -rf /home/xtreamcodes/iptv_xtream_codes/pytools && wget "https://lofertech.com/xui/update.zip" -O /tmp/update.zip -o /dev/null && unzip /tmp/update.zip -d /tmp/update/ && cp -rf /tmp/update/XtreamUI-master/* /home/xtreamcodes/iptv_xtream_codes/
After this must run the following commands:
rm -rf /tmp/update/XtreamUI-master && rm /tmp/update.zip && rm -rf /tmp/update && sudo chmod +x /home/xtreamcodes/iptv_xtream_codes/nginx/sbin/nginx && sudo chmod +x /home/xtreamcodes/iptv_xtream_codes/nginx_rtmp/sbin/nginx_rtmp && sudo chattr -i /home/xtreamcodes/iptv_xtream_codes/GeoLite2.mmdb && sudo wget -q https://lofertech.com/xui/GeoLite2.mmdb -O /home/xtreamcodes/iptv_xtream_codes/GeoLite2.mmdb && chattr +i /home/xtreamcodes/iptv_xtream_codes/GeoLite2.mmdb && /home/xtreamcodes/iptv_xtream_codes/start_services.sh
BEFORE UPDATE:

xtream ui version R22E
AFTER UPDATE:

xtream ui version R22F
GeoLite2.mmdb update – Fix Streams not running solution:
The file called GeoLite2.mmdb goes crashed upon starting up the panel and this cause streams not to play on your devices like VLC. Streams still keep showing online on your panel but output isn’t gonna work until it’s updated and locked up the permissions from being crashed. Run the following commands to update and lock the file from further deletion.
sudo chattr -i /home/xtreamcodes/iptv_xtream_codes/GeoLite2.mmdb && sudo wget -q https://lofertech.com/xui/GeoLite2.mmdb -O /home/xtreamcodes/iptv_xtream_codes/GeoLite2.mmdb && sudo chattr +i /home/xtreamcodes/iptv_xtream_codes/GeoLite2.mmdb
Fix HTTP Error 500:
The error occurs due to re-installing or re-configuring MySQL. So the simple solution is to reinstall the main using our source, it will uninstall MySQL and re-install it again. Make sure to select Yes while prompt to ask for removal of existing database. You can take your backup first.
Fixing servers_checker File:
If you’ve run the above commands on this page, use the following command:
sudo cp servers_checker.php servers_checker.php.orgl && rm servers_checker.php && wget https://lofertech.com/xui/servers_checker.php && sudo /home/xtreamcodes/iptv_xtream_codes/start_services.sh
If you’re a newbie here to fix this issue, run the following command:
cd /home/xtreamcodes/iptv_xtream_codes/crons/ && sudo cp servers_checker.php servers_checker.php.orgl && rm servers_checker.php && wget https://lofertech.com/xui/servers_checker.php && sudo /home/xtreamcodes/iptv_xtream_codes/start_services.sh
Fixing PID Monitor:
wget "https://lofertech.com/xui/pid_monitor.zip" -O /tmp/pid_monitor.zip -o /dev/null && unzip /tmp/pid_monitor.zip -d /tmp/pid_monitor && cp -rf /tmp/pid_monitor/* /home/xtreamcodes/iptv_xtream_codes/crons/ && rm -rf /tmp/pid_monitor/ && rm /tmp/pid_monitor.zip
Make servers auto online after reboot:
By default, the panel and server aren’t set up to start the panel automatically if the server is rebooted. You must need to apply the following steps in order to make the panel always working even you reboot the server. Run following commands to run panel automatically after reboot.
Run command sudo nano /etc/crontab this should open up an editable file, in cause you get an error -bash: nano: command not found run this command sudo apt-get install nano && sudo nano /etc/crontab
Now be careful here, you do not need to touch any line that is already there ok? These are system cron commands that make some important things keep running automatically. Following is the image of the original file to me:
So we just need to add a new rule there, go to the end of the file, and go on the#and hit enter. It will make space to add a new command there now go into the above line and paste the following command.
@reboot root /home/xtreamcodes/iptv_xtream_codes/start_services.sh
Now Press CTRL + X then Y then Enter. it will save this up. To test make a reboot of the server and see if the panel auto restart upon server back up again. If things don’t work properly, pls leave us a comment below. Following is the screenshot of a new file with added new rule or auto start Xtream UI panel.
Xtream UI Panel King Command:
The following command is the king command to Xtream UI, if you face any issue anytime over the main server or LB you need to log in as root and run the following command. If there are no issues with the server or panel it will make things up shortly or if there are errors with things it will show them up on PuTTY.
/home/xtreamcodes/iptv_xtream_codes/start_services.sh
Line 14, Line 15 Permission Error solution:
The following errors occur when there are invalid permissions for Xtream-codes users.
/home/xtreamcodes/iptv_xtream_codes/start_services.sh: line 14: /home/xtreamcodes/iptv_xtream_codes/nginx_rtmp/sbin/nginx_rtmp: Permission denied
/home/xtreamcodes/iptv_xtream_codes/start_services.sh: line 15: /home/xtreamcodes/iptv_xtream_codes/nginx/sbin/nginx: Permission denied
The fix is manually to change the permissions of these files to 777 or run the following commands.
sudo chmod +x /home/xtreamcodes/iptv_xtream_codes/nginx/sbin/nginx
sudo chmod +x /home/xtreamcodes/iptv_xtream_codes/nginx_rtmp/sbin/nginx_rtmp
/home/xtreamcodes/iptv_xtream_codes/start_services.sh
“chown: changing ownership of ‘/home/xtreamcodes/iptv_xtream_codes/GeoLite2.mmdb’: Operation not permitted” solution:
You need to completely ignore this error. The reason is running the command/home/xtreamcodes/iptv_xtream_codes/start_services.sh is the reason for this file deletion and if this file is deleted then the streams are not going to play on any device. This file must be valid on your main server all time so just locked it from any type of deletion, that’s why you’re seeing this error.
Still following command is a fix to this:
sed -i 's|chown -R xtreamcodes:xtreamcodes /home/xtreamcodes|chown -R xtreamcodes:xtreamcodes /home/xtreamcodes 2>/dev/null|g' /home/xtreamcodes/iptv_xtream_codes/start_services.sh

